In this guide you will learn how to make a latte art scorpion. The scorpion is one of the harder latte art designs to pour correctly. The reason being you have to pour to rosettas next to each other without ruining the design.
Difficulty | |
Prior Knowledge |
How To Pour A Latte Art Sunrise
The scorpion is an advanced coffee art technique that requires excellent milk control and cup awareness. Jug placement is essential for this coffee art.
1. Pour Two Rosettas Waves
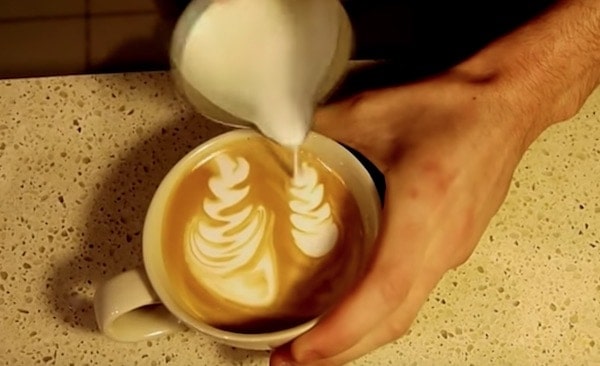
This design begins by creating two rosettas waves on either side of the cup. You do not complete the rosettas by striking the milk through. You must ensure that you begin the pour from the middle of the cup and not from the back as you have to leave room for the body of the scorpion.
I recommend slowing down your pour when creating the two rosettas, otherwise they’ll shoot off and fill up the rest of the cup. You want to make the rosettas parallel to each other on the opposite sides of the cup.

2. Turn and Create Tulip Body
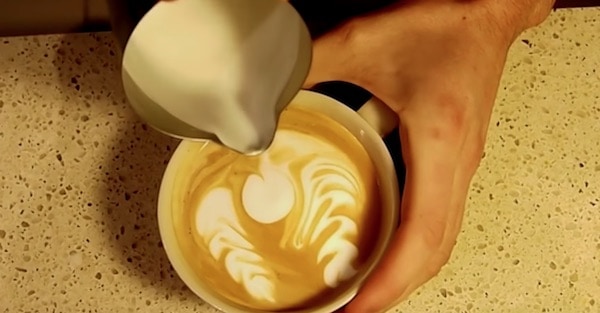
Once the two rosettas are created on either side, you want to rotate your cup 180-degrees to other side. Now you will create 1 tulip circle in the middle of the two rosettas. Make sure to shake the jug slowly side-to-side when creating the tulip circle, as this delicate design can easily stuff up. This creates the body of the latte art scorpion.

3. Create The Tail
Now that the body is complete all we have left to do is the tail and stinger of the coffee design. There are 3 parts to creating the tail and they are done at the same time. The connection to the body, the tail itself and the stinger of the scorpion.
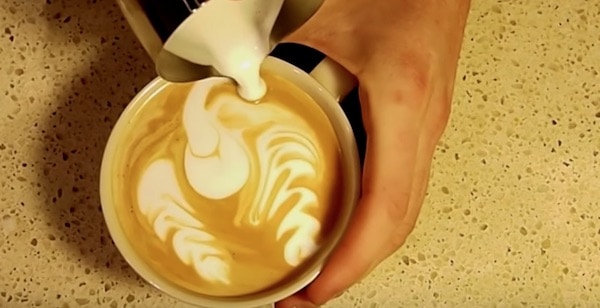
Begin by creating a small tulip circle within the body of the scorpion, however, instead of pulling away like you normally would, drag your jug back towards you in order to create the tail.
Once the tail reaches the boundary of the cup, you want to curve it back towards the centre of the cup.

4. Create The Stinger
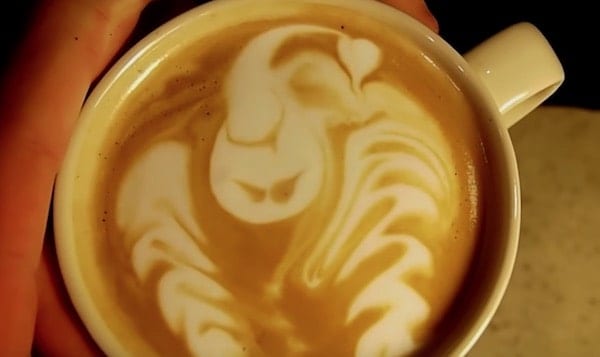
Now we will create the stinger of the scorpion. We do this by creating a mini free pour heart. Simply hold your jug stationary in the one spot and rock it gently side-to-side in order to create the heart circle.
Once you are satisfied with the size of the stinger, pull your jug up to create a thin steady flow of milk and follow through the middle of your litter circle to create the heart and stinger. Finally draw in some eyes and you have completed the coffee design!

Phew! That was a tough one to explain! Remember this latte art design is all about pouring slowly at the beginning. So take your time, take a breath and pour it slowly. You will definitely be trying this one serval times.
Keep learning! More latte art guides below...
Latte Art Classes
1. Basics of Coffee Making
2. Beginner Latte Art
3. Advanced Latte Art

